


Changing an oil separator in a production compressor is not just a maintenance checkbox; it is a controlled reliability task that affects air quality, pressure stability, and energy cost. The correct method to replace an oil separator for air compressor systems starts with diagnosis, then safe isolation, then precise installation and restart verification. In industrial plants, rushed replacement of an oil separator for air compressor units often creates secondary failures such as carryover, pressure drop, and seal damage. A disciplined workflow prevents those outcomes and keeps compressed air performance predictable.
This guide explains how to change an oil separator for air compressor equipment in a practical sequence used by maintenance teams in continuous-duty environments. It focuses on screw compressor layouts where the oil separator for air compressor function is central to oil-air separation efficiency and downstream cleanliness. You will see what to confirm before opening the machine, how to install the new element correctly, and how to validate results after startup. Following these steps reduces rework and helps your next oil separator for air compressor replacement last its full service life.
Preparation and Shutdown Discipline
Confirm Service Need Before Disassembly
Before replacing any oil separator for air compressor assembly, verify the service trigger with operating evidence. Common indicators include rising differential pressure across the separator stage, increased oil consumption, visible oil mist downstream, or unstable discharge quality. When these signals appear together, the oil separator for air compressor element is likely at end of life or contaminated by poor oil condition. Confirming the trigger avoids unnecessary downtime and prevents replacing the wrong component.
Review maintenance history, operating hours, loading profile, and recent events such as high-temperature trips or oil top-ups. A separator can fail early when the compressor repeatedly runs outside design temperature or with degraded lubricant. In that case, changing only the oil separator for air compressor element without correcting the root condition can cause a short second life. Good diagnosis ensures the next oil separator for air compressor replacement solves the actual problem rather than masking it.
Lockout, Depressurization, and Clean Access
Safe replacement begins with full lockout and complete depressurization of the package. Shut down the compressor, isolate power sources, close relevant valves, and verify zero pressure in the separator vessel before opening any housing. Attempting to remove an oil separator for air compressor cartridge under residual pressure is unsafe and can damage threads, covers, and seals. Controlled isolation also protects nearby instruments and automation components.
Prepare a clean work zone around access points before disassembly. Dust, fibers, and metal particles that enter during service can compromise the new oil separator for air compressor element immediately after startup. Use clean tools, lint-free wipes, and covered parts trays so sealing surfaces remain uncontaminated. This preparation stage often determines whether the new oil separator for air compressor performs as expected in the first run cycle.
Replacement Procedure for Screw Compressor Systems
Remove Housing and Extract Old Element
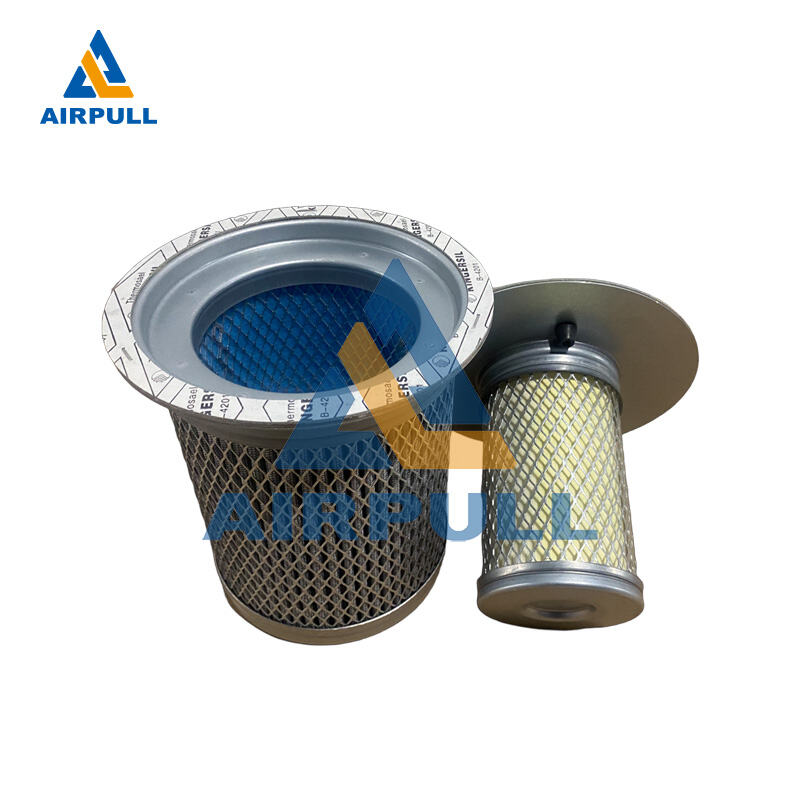
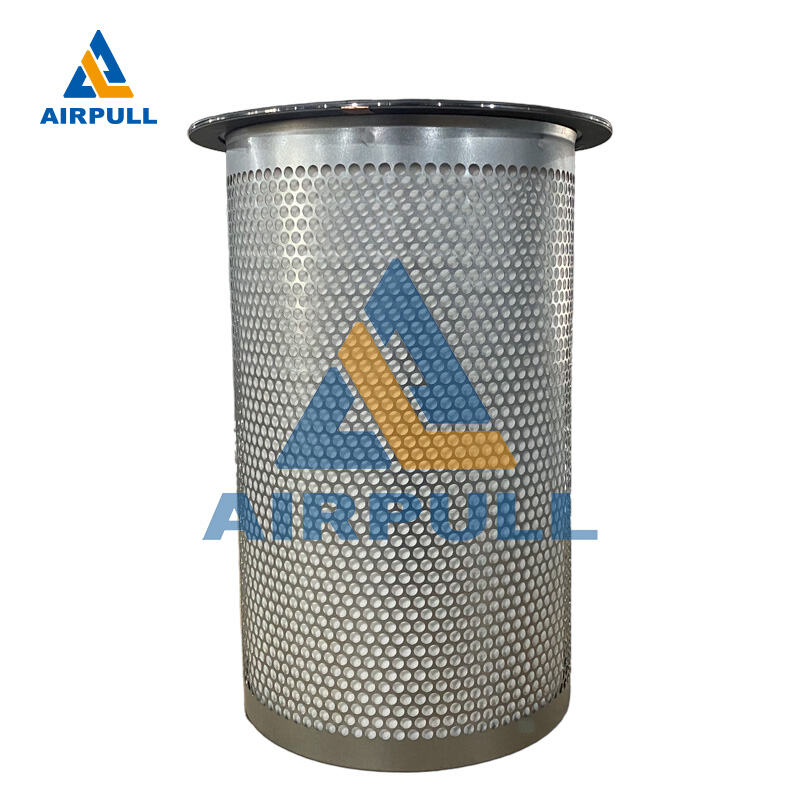
Open the separator housing according to the compressor service sequence, loosening hardware evenly to avoid cover distortion. As you expose the old oil separator for air compressor element, inspect for collapsed media, carbon buildup, varnish, and unusual sludge. These physical signs reveal whether the issue was normal wear, thermal stress, or lubricant breakdown. Capture observations for maintenance records because they guide future interval planning.
When removing the old oil separator for air compressor part, protect internal seating surfaces from scratches and impact. Do not pry against machined faces or drag the element across threaded openings. Remove old gasket material fully and clean the housing with approved solvent and lint-free materials. Proper extraction and cleaning prevent leaks and ensure the new oil separator for air compressor can seat squarely with uniform compression.
Install New Element with Correct Sealing Practice
Use a dimensionally correct replacement designed for the duty profile and pressure class of the compressor. A properly specified oil separator for air compressor should be installed with clean hands and controlled torque on all mating hardware. Lightly condition seals when required by the component guidance, then align the element carefully to avoid edge loading. Correct seating is essential for stable differential pressure and clean downstream air.
Tightening sequence matters because uneven force can deform covers and create bypass paths. Apply fastener torque in stages and in a cross pattern so compression distributes evenly around the new oil separator for air compressor seal set. Reconnect any return lines exactly as removed, checking for kinks or loose fittings. Many post-service complaints linked to an oil separator for air compressor change are actually return-line or sealing errors, not element defects.
Commissioning After Replacing the Separator
Controlled Restart and Leak Verification
After reassembly, restore the system in a controlled manner rather than full-load immediate operation. Bring pressure up gradually and inspect all opened joints for oil seepage, air leakage, and abnormal vibration. A newly installed oil separator for air compressor should stabilize quickly when seals are correct and lines are routed properly. Early leak detection protects the element from contamination and avoids unplanned shutdown shortly after service.
During the first operating period, monitor separator differential pressure trend, discharge temperature, and oil carryover indicators. A healthy oil separator for air compressor installation typically shows consistent pressure behavior without sudden drift. If differential pressure rises rapidly, investigate blocked return paths, wrong viscosity oil, or mis-seated seals. Immediate correction is cheaper than running a compromised oil separator for air compressor into failure mode.
Performance Signals to Track in the First Hours
The first hours after replacement are critical for confirming service quality. Track motor load behavior, line pressure consistency, and visual clarity of downstream air handling points. Stable readings usually indicate the oil separator for air compressor is functioning correctly under real demand. Any abnormal foaming, odor changes, or discharge fluctuations should be treated as commissioning alarms.
Record baseline values immediately after successful restart and compare them with historical norms. This creates a reference that helps detect gradual deterioration of the oil separator for air compressor over time. In plants with shift-based maintenance, documented baselines reduce interpretation errors between teams. Good records turn each oil separator for air compressor replacement into data that improves the next maintenance cycle.
Preventing Early Failure of the New Separator
Contamination Control and Oil Condition Management
An oil separator lives or fails based on contamination and lubricant condition as much as on running hours. Moisture ingress, oxidized oil, and particulate loading can shorten oil separator for air compressor life far below planned intervals. Keep intake filtration effective, control ambient contamination near the compressor room, and verify oil quality through routine checks. These steps protect the new oil separator for air compressor from premature media blockage and carryover issues.
Thermal management is equally important because persistent high operating temperature accelerates oil degradation and separator fouling. Confirm cooler cleanliness, ventilation flow, and thermostat behavior so the compressor operates within target range. When temperature stays controlled, the oil separator for air compressor can maintain efficient separation and lower downstream cleaning burden. Maintenance teams that combine oil discipline with temperature control typically extend oil separator for air compressor service stability.
Service Interval Strategy for Continuous Operations
Do not rely only on calendar-based replacement for an oil separator for air compressor in variable-load plants. Interval strategy should combine run hours, pressure-drop trend, oil condition, and duty severity. Compressors in dusty or high-cycle operations may require earlier intervention than identical units in cleaner environments. A condition-based approach keeps each oil separator for air compressor change aligned with real wear behavior.
Coordinate separator maintenance with oil and air filter service windows to reduce repeated downtime exposure. When the oil separator for air compressor is replaced as part of a planned reliability block, teams can verify related components in one controlled shutdown. This improves labor efficiency and lowers restart risk compared with fragmented interventions. Over time, integrated planning improves total lifecycle performance of every oil separator for air compressor position in the plant.
FAQ
How often should an oil separator be replaced in industrial compressor service?
Replacement interval depends on run profile, air quality requirements, lubricant condition, and operating temperature, not only on hours. Many facilities use runtime guidance as a starting point, then refine timing using differential pressure and carryover trends. For critical systems, condition monitoring gives a more accurate trigger than fixed scheduling. The goal is to replace before efficiency and air quality decline, not after failure symptoms become severe.
Can I change only the separator element without checking related components?
You can, but it increases repeat-failure risk. Separator life is strongly influenced by return-line integrity, oil health, sealing condition, and thermal control. Replacing only the element while ignoring those factors can produce short service life and recurring carryover. A quick surrounding-system check during the same shutdown improves reliability significantly.
What causes high differential pressure right after replacement?
Immediate high differential pressure usually points to installation or system issues rather than normal element aging. Typical causes include misalignment during seating, blocked return path, incompatible lubricant behavior, or contamination introduced during assembly. Verify seal compression, line routing, and housing cleanliness first. Correcting these points early usually restores expected pressure performance.
Is post-replacement monitoring really necessary when the compressor seems normal?
Yes, because many separator-related problems appear only after thermal stabilization and load variation. A machine can sound normal at startup but still show rising pressure drop or early oil carryover within hours. Tracking baseline values after service helps detect subtle faults before they become downtime events. In B2B operations, this monitoring step protects production continuity and maintenance budget discipline.
Table of Contents
- Preparation and Shutdown Discipline
- Replacement Procedure for Screw Compressor Systems
- Commissioning After Replacing the Separator
- Preventing Early Failure of the New Separator
-
FAQ
- How often should an oil separator be replaced in industrial compressor service?
- Can I change only the separator element without checking related components?
- What causes high differential pressure right after replacement?
- Is post-replacement monitoring really necessary when the compressor seems normal?
