


Installing a self cleaning air filter is not just a mechanical task; it is a reliability decision that affects uptime, maintenance labor, and process stability. In industrial environments where dust loading changes by season, shift, and production mode, the way you install a self cleaning air filter directly impacts pressure drop behavior and cleaning efficiency from day one. A correct installation creates balanced airflow, proper pulse cleaning, and predictable maintenance intervals, while a rushed installation can cause bypass, premature wear, and repeated shutdowns. This guide explains how to install a self cleaning air filter in a practical sequence that plant teams can apply on real equipment.
The most effective installation method for a self cleaning air filter starts before the first bolt is tightened. You need to confirm orientation, airflow direction, pulse air quality, control wiring, and sealing conditions before commissioning. When those factors are aligned, a self cleaning air filter can keep intake air quality consistent and reduce manual filter servicing across compressors, blowers, turbines, furnaces, and pneumatic systems. The sections below follow a step-by-step workflow so your self cleaning air filter enters service with stable performance and long element life.
Prepare the Site and Validate System Compatibility
Confirm airflow, pressure, and particulate conditions
Before installing a self cleaning air filter, verify the real operating flow rate rather than relying only on design documents. Many facilities have drifted from original conditions, and that mismatch can push a self cleaning air filter outside its ideal cleaning cycle range. Check average and peak airflow, expected dust concentration, and the particle size profile. These values determine whether the selected self cleaning air filter can maintain acceptable differential pressure during full production.
Pressure boundaries also matter at this stage. Evaluate inlet and outlet static pressure, available compressed air pressure for pulse cleaning, and allowable pressure drop across the self cleaning air filter. If compressed air pressure is unstable, the cleaning pulse may not dislodge dust cake effectively, even when the controller is correctly configured. A self cleaning air filter performs best when process conditions are measured and confirmed before installation, not after commissioning problems appear.
Inspect mounting location and service access
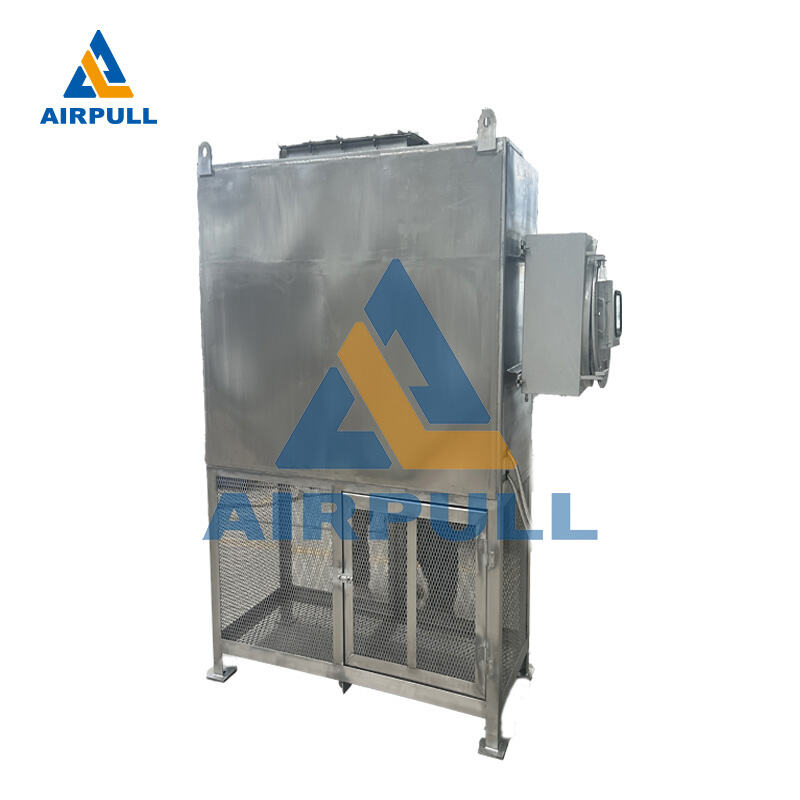
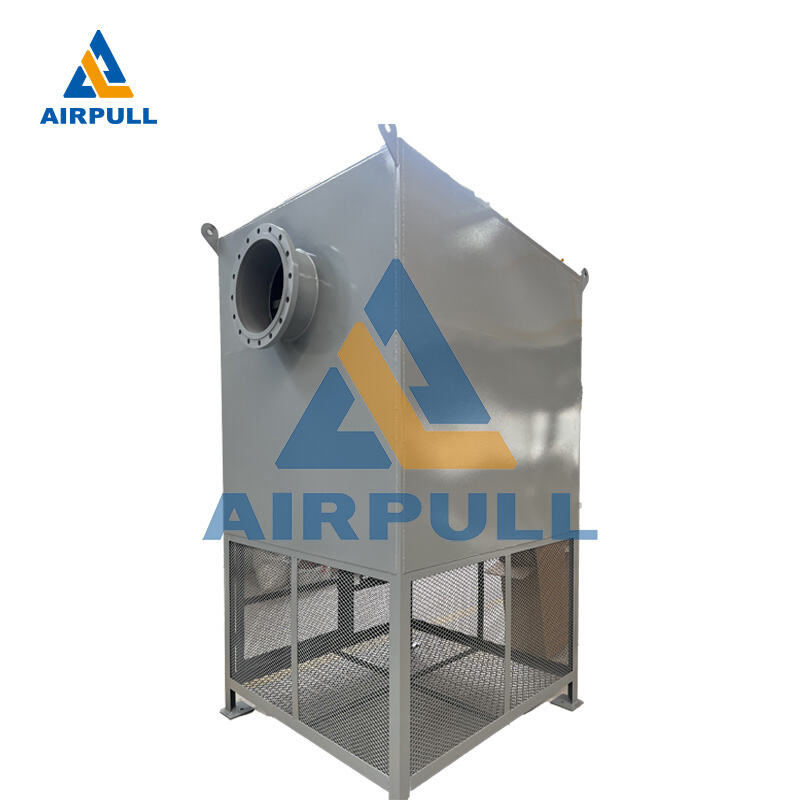
A self cleaning air filter needs enough clearance for element removal, pulse manifold inspection, and safe technician movement. Confirm lifting access, platform stability, and door opening paths around the housing. If the unit is installed too close to walls or pipe racks, routine service becomes difficult, and filter changes may be delayed. Installation quality includes maintainability, and a well-positioned self cleaning air filter protects long-term operational discipline.
Check structural support, vibration exposure, and weather sealing for outdoor applications. If the base frame is uneven, gasket compression can become nonuniform, creating leakage paths around the self cleaning air filter housing. In corrosive or humid environments, verify coating integrity and drainage points to prevent water accumulation. Planning these details before placement reduces commissioning rework and ensures the self cleaning air filter starts in a controlled condition.
Install the Housing and Mechanical Interfaces Correctly
Align ducting and secure the filter housing
Position the self cleaning air filter according to airflow direction markings and connection orientation. Misalignment at the duct flange can introduce mechanical stress into the housing and eventually loosen seals. Use proper gasket materials and tighten fasteners in a cross pattern to maintain even compression. A self cleaning air filter depends on airtight flow paths, so mechanical alignment is a core performance requirement rather than a cosmetic detail.
During bolt-up, verify that transitions and elbows upstream do not create severe velocity distortion. Strong swirl entering a self cleaning air filter can cause uneven dust loading across elements, which shortens cleaning intervals and increases pressure drop. Where needed, install flow straightening or adequate straight-run distance before the inlet. Mechanical installation of a self cleaning air filter should protect airflow uniformity from the beginning.
Seal all joints and prevent unfiltered air bypass
Bypass leakage is one of the most common installation errors for a self cleaning air filter. Even a small gap at inspection doors, gasket seams, or instrument ports can allow unfiltered air into downstream equipment. Perform visual checks on every sealing surface and verify gasket seating before final closure. A self cleaning air filter only delivers rated filtration when all incoming air is forced through the filter media path.
After assembly, conduct a leak check with a practical field method suited to your plant standard. Focus especially on panel corners, door latches, and duct transition joints. If any leakage is found, correct it before start-up rather than compensating with aggressive pulse settings. Over-cleaning cannot fix bypass, and it can reduce element life in a self cleaning air filter. Tight sealing is the foundation of effective operation.
Connect Pulse Cleaning and Control Systems
Set up compressed air quality and pulse manifold integrity
The cleaning function in a self cleaning air filter depends on dry, oil-free compressed air at stable pressure. Install or verify moisture separation and filtration on the pulse air supply line to protect valves and nozzles from contamination. Wet or oily air can foul components and reduce pulse force, making the self cleaning air filter appear undersized when the issue is actually supply quality. Confirm regulator setting and pressure stability under dynamic plant demand.
Inspect the pulse manifold for correct nozzle orientation and secure fittings. Loose connections can create pressure losses that weaken cleaning pulses across sections of the self cleaning air filter. Ensure solenoid valves are wired correctly and test each firing channel before placing process load on the unit. A properly connected pulse system allows the self cleaning air filter to maintain consistent differential pressure without excessive air consumption.
Configure differential pressure controls and alarm thresholds
Most self cleaning air filter systems use differential pressure logic to trigger pulse cleaning. Install sensing lines carefully, avoid sharp bends, and protect ports from dust blockage. Then set low and high pressure thresholds based on the supplier's recommended range and your process dust profile. Correct control tuning helps a self cleaning air filter clean only when needed, balancing media protection with pressure stability.
Tie alarms into plant monitoring so operators can react before restrictions affect process equipment. A rising baseline pressure trend in a self cleaning air filter often signals abnormal dust load, moisture carryover, or pulse system degradation. With clear alarm limits and trend visibility, your team can address root causes early. Control integration turns a self cleaning air filter from a passive component into an actively managed reliability asset.
Commission, Test, and Stabilize Early Operation
Run initial start-up checks under controlled load
At first start, bring the self cleaning air filter online in stages and watch differential pressure response closely. Verify that pulse events are occurring at expected intervals and that pressure returns after each cleaning sequence. Listen for abnormal valve noise and inspect for vibration at ducts and access doors. Early observation helps confirm the self cleaning air filter is operating as installed, not just as intended on paper.
Document baseline values during stable operation, including airflow, pulse pressure, cleaning frequency, and pressure drop. These baseline records become your reference for future troubleshooting and performance drift analysis. A self cleaning air filter with clear commissioning data is easier to maintain and optimize over time. Without baseline data, teams often rely on guesswork when conditions change.
Verify filtration performance and tune operating parameters
After start-up, sample downstream air quality according to your plant standard to confirm the self cleaning air filter is meeting expected cleanliness targets. If dust carryover appears, inspect seals and element seating before changing control settings. Do not overcompensate by increasing pulse frequency immediately, because frequent pulsing can accelerate media fatigue in a self cleaning air filter. Correct the physical cause first, then adjust control logic.
Fine-tuning should be incremental and data-driven. Adjust pulse interval, pulse duration, and pressure thresholds one step at a time, and verify impact after each change. This approach helps the self cleaning air filter reach a steady operating window with efficient cleaning and low compressed air use. For reference specifications and configuration details, teams often review the product page for self cleaning air filter applications before final parameter lock-in.
Build a Maintenance Routine That Protects Installation Quality
Establish inspection intervals and service standards
A correctly installed self cleaning air filter still needs disciplined inspection to keep performance stable. Create routine checks for differential pressure trends, pulse valve response, gasket condition, and housing integrity. Frequent light inspections are more effective than rare major interventions because they catch deviations before failures propagate. Maintenance standards should preserve the original installation condition of the self cleaning air filter.
Define clear criteria for element replacement based on pressure behavior, media condition, and process requirements. Replacing too early raises operating cost, while replacing too late can force high resistance and process instability. A self cleaning air filter operates most economically when replacement decisions are based on measured performance, not fixed calendar assumptions. Include technician notes and photos to improve continuity across shifts.
Train operators on practical troubleshooting signals
Operator awareness determines how quickly a self cleaning air filter issue is recognized. Train teams to spot warning patterns such as rising baseline pressure, irregular pulse sound, compressed air consumption spikes, or repeated high-pressure alarms. These signs usually indicate a specific fault path that can be corrected before shutdown risk grows. Fast diagnosis protects both filtration quality and process uptime.
Build a simple escalation workflow that links symptoms to verification steps and corrective actions. For example, if a self cleaning air filter shows weak cleaning, verify air pressure stability, valve actuation, and nozzle condition before replacing elements. This sequence avoids unnecessary part changes and shortens repair time. Strong troubleshooting discipline keeps the self cleaning air filter aligned with its installed design performance.
FAQ
How long does it take to install a self cleaning air filter in an industrial line?
Installation time depends on duct modifications, control integration, and commissioning depth, but most projects require more than just mechanical placement. A self cleaning air filter can be physically mounted in a short window, yet full installation includes sealing verification, pulse air setup, electrical checks, and baseline testing. Plants that include all validation steps usually achieve faster stabilization after startup.
Can an existing system be retrofitted with a self cleaning air filter without major redesign?
Many systems can accept a self cleaning air filter retrofit, but success depends on available space, airflow compatibility, and compressed air quality. The retrofit should include a check of structural support, duct alignment, and service clearance for element access. When those conditions are addressed early, a self cleaning air filter retrofit can improve reliability without a full process rebuild.
What is the most common installation mistake with a self cleaning air filter?
The most common mistake is allowing bypass leakage due to uneven gasket compression or poorly sealed access points. Even with correct pulse settings, a self cleaning air filter cannot compensate for unsealed joints because unfiltered air avoids the media path. Careful torque sequence, flange alignment, and leak verification are essential to avoid this issue.
How do you know a self cleaning air filter is installed and running correctly?
A properly installed self cleaning air filter shows stable differential pressure within target range, consistent pulse response, and acceptable downstream air cleanliness under normal load. It should also operate without abnormal vibration, unexplained air consumption increases, or frequent alarm events. Commissioning records that capture baseline values make it easy to confirm that the self cleaning air filter remains in control over time.
Table of Contents
- Prepare the Site and Validate System Compatibility
- Install the Housing and Mechanical Interfaces Correctly
- Connect Pulse Cleaning and Control Systems
- Commission, Test, and Stabilize Early Operation
- Build a Maintenance Routine That Protects Installation Quality
-
FAQ
- How long does it take to install a self cleaning air filter in an industrial line?
- Can an existing system be retrofitted with a self cleaning air filter without major redesign?
- What is the most common installation mistake with a self cleaning air filter?
- How do you know a self cleaning air filter is installed and running correctly?
