


Quraşdırmaq vint kompressor hava filtrı hər bir sıxılmış hava sistemi operatoru tərəfindən mənimsənilməsi vacib olan bir texniki xidmət əməliyyatıdır. Düzgün quraşdırma sistem performansının optimal səviyyədə olmasını, avadanlığın ömrünü uzadmasını və sənaye tətbiqlərində havanın keyfiyyət standartlarını saxlamasını təmin edir. Bu ətraflı təlimat, sistemin səmərəliliyini maksimum dərəcədə artırarkən, tornavida sıxma kompressorunuzun hava filtrini təhlükəsiz və effektiv şəkildə dəyişdirmək üçün addım-addım təlimatlar verir.

Tornavida Sıxma Kompressorunun Hava Filtr Komponentlərinin Başa Düşülməsi
Birincil Filtrasiya Elementləri
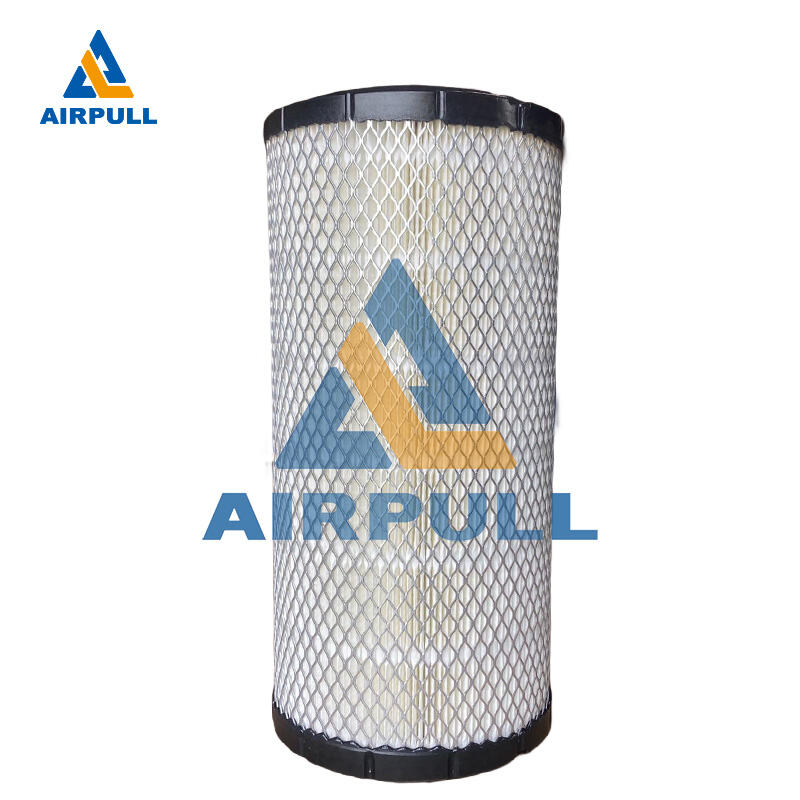
Vintli kompressorun hava filtr sistemi, gələn havadan çirkləri çıxarmaq üçün nəzərdə tutulmuş bir neçə filtrasiya mərhələsindən ibarətdir. Birincil filtrasiya elementləri adətən havanın sıxılma kamerasına daxil olmasından əvvəl daha böyük hissəcikləri və çirkliyi tutur. Bu elementlər qatlama şəklində hazırlanmış filtr materiallarından ibarətdir və effektiv hissəcik tutma üçün maksimum səth sahəsi təmin edir, eyni zamanda optimal hava axını xarakteristikalarını saxlayır.
Vintli kompressorunuzun konkret hava filtr konfiqurasiyasını başa düşmək düzgün quraşdırma üçün çox vacibdir. Əksər sənaye vintli kompressorları standart rezьbə qoşulmaları və ya bayonet tipli montaj sistemləri ilə silindrik filtr elementlərindən istifadə edir. Filtr korpusunun dizaynı istehsalçılara görə dəyişir, lakin ümumi xüsusiyyətlərə xidmət göstəriciləri, süzgəc boşaltma klapanları və fövqəladə iş rejimi üçün keçid mexanizmləri daxildir.
İkinci dərəcəli Filtrasiya Sistemləri
İkincil filtrasiya komponentləri, müəyyən edilmiş havanın keyfiyyəti standartlarını əldə etmək üçün birinci elementlərlə birlikdə işləyir. Bu sistemlər tez-tez sıxılmış havadan yağ buxarlarını və nəmi aradan qaldıran koalesans filtrlərini daxil edir. vint kompressor hava filtrı quraşdırma prosesi bu ikincil elementlərin sızdırmazlığı və düzgün oriyentasiyasını təmin etmək üçün nəzərdə tutulub ki, bununla ötürmə və çirklənmənin qarşısı alınmış olsun.
Peşəkar quraşdırma axış istiqaməti göstəricilərinə və rezinovalı birləşmələr üçün düzgün burma momenti (torque) tələblərinə diqqət yetirməyi tələb edir. Bir çox ikincil filtrasiya sistemləri filtrin yüklənməsini izləyən və dəyişdirilmə müddətlərini göstərən fərq təzyiqi manometrlərini daxil edir. Bu monitorinq sistemlərini başa düşmək, davamlı hava keyfiyyətini saxlamağa və avadanlığın erkən aşınmasını qarşısını almağa kömək edir.
Quraşdırmadan əvvəl təhlükəsizlik və hazırlıq
Sistemin söndürülmesi prosedurları
Hər hansı bir vintli kompressor havanı təmizləyici filtrimin dəyişdirilməsinə başlamazdan əvvəl, təhlükəsizlik və düzgün quraşdırma üçün tam sistem dayandırılması mütləq tələb olunur. Kompressoru dayandıraraq və sistemin ətraf temperaturuna soyumasına imkan verərək başlayın. Sıxılma kamerası və borularında qalan istilik filtr xidməti zamanı yanğınlara səbəb ola bilər. Elektrik enerjisini əsas avtomatik açarından kəsin və qeyri-qəsdən işə salınmaması üçün kilidləmə və etiketləmə prosedurlarını tətbiq edin.
Drain klapanlarını və əl ilə idarə olunan təzyiq azaldıcı klapanları açaraq bütün havanı sıxma sistemini təzyiqsizləşdirin. Sıxılmış hava sistemləri gözlənilmədən azad olarsa, ciddi yaralanmalara səbəb ola biləcək əhəmiyyətli miqdarda enerji saxlayırlar. Filtr qutusunun sökülməsinə keçməzdən əvvəl kalibrasiya edilmiş manometrlərlə sıfır təzyiqin olduğunu yoxlayın. Bəzi sistemlərdə tam təzyiq azaldılmasını təmin etmək üçün bir neçə təzyiq azaldılma nöqtəsi tələb olunur.
Lazım olan alətlər və materiallar
Doğru vida kompressoru hava filtrinin quraşdırılması üçün təhlükəsiz və effektiv tamamlanma üçün xüsusi alətlər və materiallar tələb olunur. Əsas alətlərə qutu boltları üçün uyğun anahtarlar, düzgün montaj üçün moment anahtarı və sızdırmaz birləşmələr üçün möhürləyici birləşdirici və ya O-halqaları daxildir. Əllərinizi, gözlərinizi və bədəninizin digər hissələrini kəskin kənarlardan və qalıq yağ çirklənməsindən qorumaq üçün əlcək, təhlükəsizlik gözlüyü və qoruyucu geyim kimi təhlükəsizlik avadanlıqları istifadə edilməlidir.
Orijinal avadanlıq spesifikasiyalarına uyğun (ölçüləri, süzgəc səmərəliliyi və təzyiq reytinqi daxil olmaqla) əvəz ediləcək filtr elementlərini toplayın. Doğru əvəz elementlərinin seçilməsini təmin etmək üçün çıxarılma əvvəlində mövcud filtrin hissə nömrələrini və spesifikasiyalarını qeyd edin. Keyfiyyətli əvəz elementləri sistem performansını saxlayır və iş şəraitində etibarlı xidmət müddəti təmin edir.
Addım addım Quraşdırma Prosesi
Qutunun sökülməsi
Sıkıştırıcı havanın süzgəc qutusunun sökülməsinə istehsalçının təlimatlarına uyğun olaraq montaj boltlarını və ya qıskacları diqqətlə çıxarmaqla başlayın. Montaj səthlərinə və birləşdirici borulara zərər verməmək üçün qutu komponentlərini çıxararkən onları dəstəkləyin. Yeni süzgəc elementlərini kontaminasiyaya məruz qoymaqla nəticələnə biləcək toz, yağ və çirkli hissəcikləri aradan qaldırmaq üçün uyğun həlledicilərdən istifadə edərək bütün qutu səthlərini ətraflı təmizləyin.
Qutu komponentlərini möhürləmə və ya struktur bütövlüyü ilə bağlı zədələnmə, korroziya və ya aşınma əlamətləri üçün yoxlayın. Xüsusilə möhürləmə üçün kritik əhəmiyyət daşıyan O-halka çuxurları, vida birləşmələri və montaj səthlərini diqqətlə yoxlayın. Süzgəcin quraşdırılmasından əvvəl zədələnmiş möhürləyici elementləri dəyişdirin və hər hansı struktur problemləri ilə bağlı tədbirlər görün.
Süzgəc Elementinin Quraşdırılması
Yeni vida kompressoru havanı süzgəc elementlərini süzgəc qutusundakı istiqamət oxları və oriyentasiya işarələrinə uyğun olaraq quraşdırın. Düzgün oriyentasiya doğru hava axını istiqamətini və optimal süzgəc performansını təmin edir. O-ring sıxlama qaplamalarına quraşdırma prosesini asanlaşdırmaq və sıxlama qaplamalarının zədələnməsini qarşısını almaq üçün nazik bir təbəqə təmiz kompressor Yağı o-ring sıxlama qaplamalarına tətbiq edin.
Sadəcə kalibrə edilmiş moment açarı ilə istehsalçının müəyyən etdiyi moment dəyərlərinə uyğun olaraq rezьbli birləşmələri sıxın. Artıq sıxma süzgəc elementlərinə və ya qutunun rezьb hissəsinə zərər verə bilər, kifayət qədər sıxılmaması isə keçid sızıntısına səbəb ola bilər. Çoxsaylı boltlu birləşmələrdə bərabər yüklənməni və bütün birləşmə nöqtələrində düzgün sıxlamanı təmin etmək üçün ardıcıl sıxma nümunələrini izləyin.
Quraşdırmadan sonra testlər və doğrulama
Sistemə başlama prosedurları
Vintlənən kompressorun havanı təmizləyən filtrini quraşdırdıqdan sonra sistemin təzyiqini diqqətlə, postepen işə salma prosedurları ilə bərpa edin. Bloklama və etiketləmə cihazlarını çıxarın və kompressor sisteminə elektrik enerjisini bərpa edin. Kompressoru işə salın və quraşdırma problemlərini göstərə biləcək qeyri-adi səslər, titrəmələr və ya təzyiq dalğalanmalarını müşahidə etmək üçün ilk işə salma zamanı onu izləyin.
Filtrin düzgün quraşdırılması və möhürlənməsinin yoxlanılması üçün ilk işə salma zamanı sistemin təzyiqini müşahidə edin. Filtr elementləri üzərindəki təzyiq itirməsi yeni elementlər üçün istehsalçının verdiyi texniki xüsusiyyətlərlə uyğun olmalıdır. Artıq təzyiq itirməsi quraşdırmanın səhv olması, elementlərin zədələnməsi və ya dərhal diqqət tələb edən sistem tıxanmalarını göstərə bilər.
İşləkliyin Təsdiqi
Sistem funksiyasının düzgün işləməsini təmin etmək üçün monitor vintli kompressorun hava filtrinin performansını əməliyyatın ilk saatları ərzində izləyin. Qutu birləşmələri ətrafında xarici sızıntını yoxlayın və bütün süzgəc klapanlarının və xidmət portlarının düzgün qapalı olduğunu təsdiqləyin. Gələcək istinad və texniki xidmət planlaşdırılması üçün bazov təzyiq düşmələrini və axın sürətlərini sənədləşdirin.
Filtrasiya sisteminin aşağı axınında havanın keyfiyyətini uyğun test avadanlığı ilə yoxlayın. Təmiz, quru sıxılmış hava müəyyən edilmiş tətbiq üçün tələb olunan saflıq standartlarına cavab verməlidir. Gözlənilən hava keyfiyyəti parametrlərindən hər hansı bir meyl filtrin keçirilməsi, quraşdırma xətaları və ya sorğulanan ehtiyat hissələrinin çirklənməsi kimi problemləri göstərə bilər və bu hallarda araşdırma aparılmalıdır.
Texniki xidmət planlaşdırılması və ən yaxşı təcrübələr
Dəyişdirilmə müddətinin planlaşdırılması
Hava filtri əvəzetmə cədvəllərini iş şəraiti, havanın təmizlik tələbləri və istehsalçının tövsiyələrinə əsasən müvafiq şəkildə təyin edin. Ətraf mühit amilləri — məsələn, ətrafdakı toz səviyyəsi, rütubət və temperatur dəyişiklikləri — filtrin xidmət müddətini əhəmiyyətli dərəcədə təsir edir. Zərrəcik yüklənməsi yüksək olan sənaye obyektlərində sistem performansını qorumaq üçün daha tez-tez filtr dəyişilməsi tələb olunur.
Filtrin yüklənməsini izləmək və əvəzetmə vaxtını optimallaşdırmaq üçün fərq təzyiqi göstəricilərini müntəzəm olaraq nəzarət edin. Vaxtından əvvəl aparılan əvəzetmə resursların israfına səbəb olur, halbuki gecikdirilmiş əvəzetmə sistem səmərəliliyini azaldır və avadanlığın zədələnməsinə səbəb ola bilər. Trend analizi üçün əvəzetmə tarixləri, iş saatları və təzyiq düşməsi ölçümləri daxil olmaqla ətraflı texniki xidmət qeydlərini saxlayın.
Müxtəlif Məsələlərin Düzəlməsi
Sistem dayanması və avadanlıq zərərlərinin qarşısını almaq üçün ümumi vida kompressoru havanı təmizləyən filtrlərlə bağlı problemləri dərhal həll edin. Artıq təzyiq düşmələri tez-tez elementlərin tıxanması, səhv quraşdırılma və ya tətbiq üçün kiçik ölçülü filtrər göstəricisidir. Keçid sızıntısı adətən zədələnmiş möhürlər, düzgün olmayan moment və ya düzgünlüyünü itirmiş korpus səthlərindən yaranır və bu problemlərin aradan qaldırılması tələb olunur.
Filtrasiya sistemlərindən sonra aşağı keyfiyyətli hava, quraşdırma zamanı elementlərin zədələnməsi, saxta ehtiyat hissələrin istifadəsi və ya sistemin çirklənməsi haqqında işarə ola bilər. Bütün performansdan meyl etmələri sistemli şəkildə araşdırın ki, kök səbəbləri müəyyən edilsin və uyğun düzəldici tədbirlər həyata keçirilsin. Müntəzəm texniki xidmət əksər filtrasiya problemlərini qarşısını alır və sıxılmış hava sisteminin etibarlı işləməsini təmin edir.
SSS
Vida kompressoru havanı təmizləyən filtrimi nə vaxt dəyişməliyəm
Screw kompressorun hava filtr elementlərinin dəyişdirilmə tezliyi iş şəraitindən və havanın keyfiyyəti tələblərindən asılıdır. Tipik servis müddətləri 2000–8000 iş saatı arasında dəyişir; tozlu mühitlərdə isə daha tez-tez dəyişdirmə tələb olunur. Optimal dəyişdirmə vaxtını müəyyən etmək üçün yalnız zaman əsaslı cədvəllərə əsaslanmaq əvəzinə, fərq təzyiqi göstəricilərini izləyin.
Screw kompressorun hava filtr elementlərini təmizləyib təkrar istifadə edə bilərmi?
Çoxlu screw kompressor hava filtr elementləri tək istifadə üçün nəzərdə tutulmuşdur və onları təkrar istifadə üçün effektiv şəkildə təmizləmək mümkün deyil. Qatlama (pleated) filtr materiallarını təmizləməyə çalışarkən çox vaxt filtrasiya strukturu zədələnir və səmərəlilik azalır. Bəzi metal ön filtrler yuyula bilər, lakin təmizləmə prosedurlarını başlamaqdan əvvəl istehsalçının texniki xüsusiyyətlərinə müraciət edin.
Screw kompressorun hava filtrinin erkən arızalanmasına səbəb nədir?
Filtrin vaxtından əvvəl sıradan çıxması adətən çoxlu çirklənmə, düzgün olmayan quraşdırılma və ya layihə parametrlərindən artıq işləmə nəticəsində baş verir. Yüksək ətraf mühit toz səviyyəsi, kifayət qədər ön filtrasiya və sistem təzyiqinin anidən yüksəlməsi filtrin xidmət müddətini əhəmiyyətli dərəcədə azalda bilər. Doğru quraşdırma üsulları və mühit nəzarəti filtrin performansını və xidmət intervallarını maksimuma çatdırmağa kömək edir.
Sıkıştırıcı havası üçün vida filtrim düzgün quraşdırılıb-quraşdırılmadığını necə anlayıram?
Düzgün quraşdırılmış vida sıkıştırıcısı havası filtri normal təzyiq düşmələri, təmiz aşağı axın havası keyfiyyəti və xarici sızıntı yaratmır. Filtrin quraşdırılmasından dərhal sonra sistem təzyiqlərini izləyin və yeni elementlər üçün istehsalçının göstərilən spesifikasiyaları ilə müqayisə edin. Hər hansı qeyri-adi təzyiq göstəriciləri, havanın keyfiyyəti ilə bağlı problemlər və ya görünən sızıntı quraşdırma problemlərinin olduğunu göstərir və bu problemlər dərhal aradan qaldırılmalıdır.
İçindəkiler
- Tornavida Sıxma Kompressorunun Hava Filtr Komponentlərinin Başa Düşülməsi
- Quraşdırmadan əvvəl təhlükəsizlik və hazırlıq
- Addım addım Quraşdırma Prosesi
- Quraşdırmadan sonra testlər və doğrulama
- Texniki xidmət planlaşdırılması və ən yaxşı təcrübələr
-
SSS
- Vida kompressoru havanı təmizləyən filtrimi nə vaxt dəyişməliyəm
- Screw kompressorun hava filtr elementlərini təmizləyib təkrar istifadə edə bilərmi?
- Screw kompressorun hava filtrinin erkən arızalanmasına səbəb nədir?
- Sıkıştırıcı havası üçün vida filtrim düzgün quraşdırılıb-quraşdırılmadığını necə anlayıram?
